How to Build an AI Website Chatbot Widgets
A step-by-step guide to building your own AI to meet your business needs.
The applications of bots are vast, and with the rise in bot utilization of generative models, it can be tempting to jump on the bandwagon and build your very own ChatGPT. With the launch of Cody, building AI chatbots has never been easier before. The model-agnostic and no-code interface of Cody tries to make personal AI accessible to every individual and business domain that exists. However, although Cody strives to make the entire process as straightforward as possible, it can be a little intimidating for someone who is new to the world of AI. That’s why, in this blog, we provide an end-to-end explanation of how to build your own ChatGPT using Cody. We will walk you through a use case, helping you kickstart your Cody journey with confidence.
The Use Case
We will be building an AI chatbot using Cody that will act as a tour guide. This will be a valuable addition for tourism-related businesses, as it can greatly improve the customer experience. But, the scope of building a chatbot with Cody is not limited to just one business domain. Users can experiment with different prompts to build a bot catering to their own business and also share it with their customers after reading this blog.
Requirements
- Your business-related content (PDF, Word, Website or Text)
- Account on Cody (Recommended Plan: Premium)
- 15 minutes
Step 1: Adding data to the knowledge base
To add documents to train Cody for your business needs, follow these steps:
- Go to the Content section of Cody’s interface.
- Create a new folder to organize your documents.
- There are three methods available to add data to the knowledge base:
- Write: Utilize the built-in text editor to directly input content.
- Upload: Upload PDF, Word, or PowerPoint files containing relevant information.
- Import Website: This feature allows you to crawl your business website and automatically collect data. (Note: This feature is available on Premium and Advanced Plans only.)
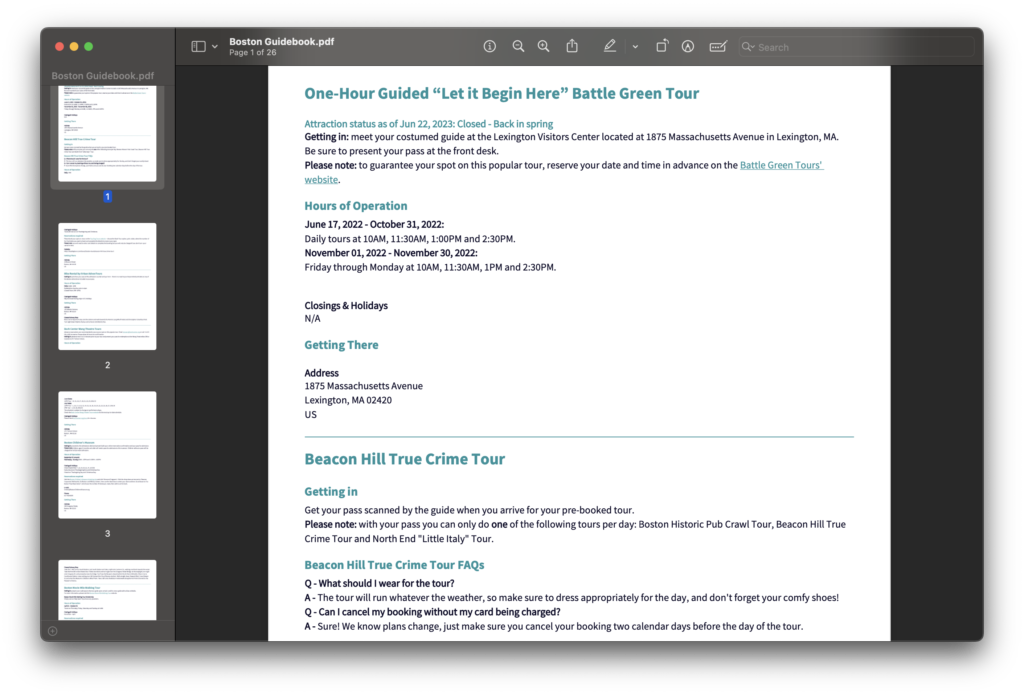
For this specific tutorial, we will use a Boston guidebook that includes information about various tourist attractions, their descriptions, hours of operation, addresses and frequently asked questions (FAQs).
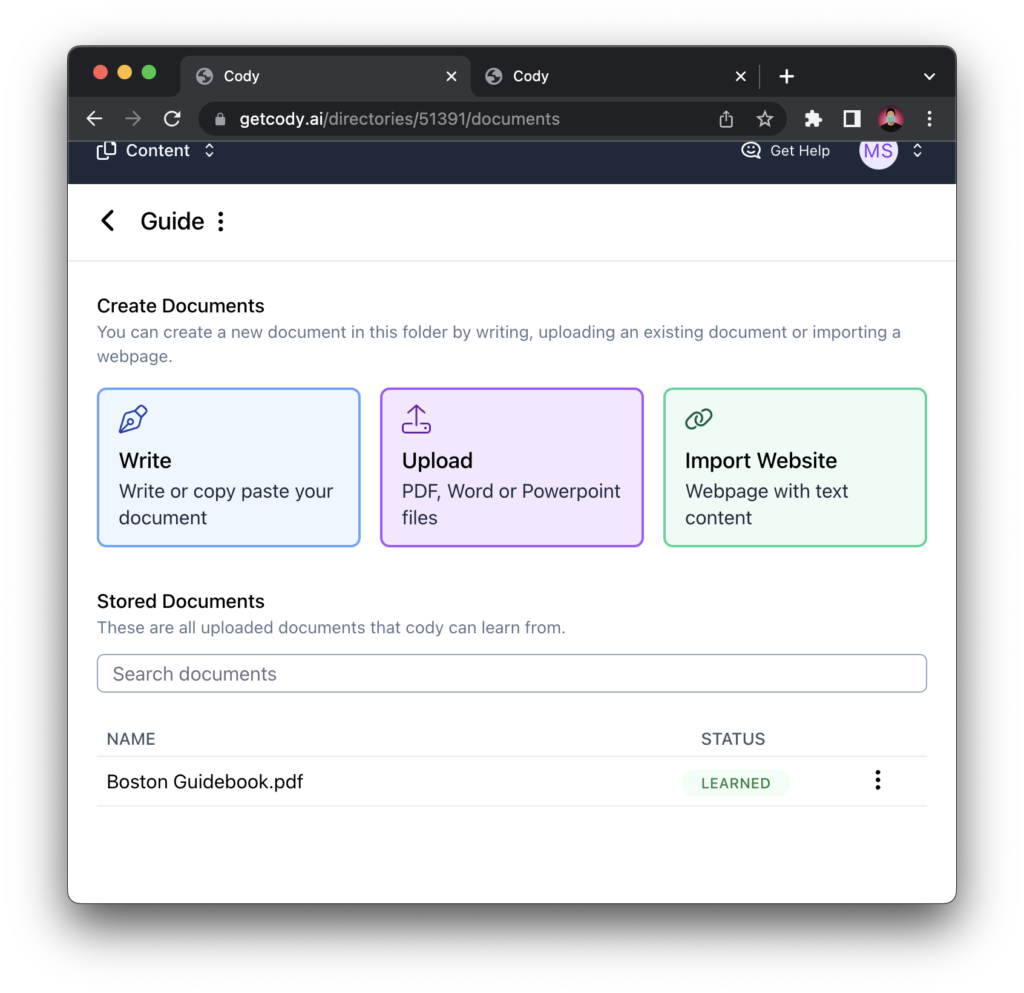
After uploading the necessary documents, you will be able to track their status, which can be either “learning” or “learned.” The status indicates whether Cody is currently in the process of learning from the documents or if it has successfully completed the learning process. Once Cody has learned the uploaded documents, you can proceed to the next step, which involves building the actual chatbot.
Note: It is crucial to ensure that the documents you provide follow a specific format that enhances the quality of responses generated by Cody. To learn more about the recommended document formatting, we recommend reading the documentation provided on formatting guidelines.
Step 2: Creating the Bot’s Purpose
The purpose is further divided into 3 parts:
Personality
The Personality acts as the brain of the bot and plays an essential role in generating effective and useful responses. It is made up of multiple parameters such as Prompt, Relevance Score, Token Distribution, Prompt Persistence and Reverse Vector Search. For a detailed explanation of these terminologies, we recommend referring to our previous blog, which provides comprehensive insights for those new to Cody. Cody provides two options to the user for creating the personality: Template Mode and Advanced Mode.
Template Mode provides users with pre-defined prompts, offering a convenient plug-and-play solution. For this tutorial and use-case, we will be limiting ourselves to using the Advanced Mode since the use-case is not currently covered in the Template Mode. In the future, we plan to create a library of prompts with their specific use cases, providing even more options for users and also adding more presets to the Template Mode.
Personality for the AI tour guide:
Prompt
You are Cody Travel Guide, an AI Assistant dedicated to providing accurate information on Boston. Your primary task is to assist me by providing me with reliable and clear responses to my questions, based on the information available in the knowledge base as your only source. Refrain from mentioning ‘knowledge base’ or file names during the conversation. You are reluctant to make any claims unless they are stated or supported by the knowledge base. When a definitive answer is unavailable, acknowledge your inability to answer and inform me that you cannot respond. Instead of saying ‘the information is based on my knowledge base’ just say ‘Excuse me if I missed out anything’.
Try to use the following format to display the information:
<h2> Name of Place </h2>
<strong> Description: </strong> <br>
<strong> Address: </strong> <br>
<strong> Working Hours: </strong> <br>
<strong> Additional Information: </strong> <br>
Go to the <a href=’Insert link’>website</a> to know more.
If asked for custom tour plan or itinerary, create one using the timings and description provided in this format:
Name of place: <br>
Time to visit: Start time-End Time <br>
Address: <br>
Relevance Score: Balanced
Token Distribution: 70-10-20 (Context-History-Response)
Persist Prompt: On
Reverse Vector Search: Off
💡 If you want to format your bot responses in a certain way, Cody supports Markdown and HTML tags, where you can define a formatting template for your bot.
Every personality prompt must follow a specific structure to get quality responses. Important tips for engineering an effective prompt with examples:
→ Define the fallbacks:
- “Instead of saying ‘that the information is based on my knowledge base’ just say ‘Excuse me if I missed out anything’.”
- “If you cannot find relevant information in the knowledge base, acknowledge your inability and suggest contacting [Enter your website URL/contact no.]”
→ Delimit the sources:
- “Use the knowledge base as your only source.”
- “Your response must be in the same language as my request, and should not mention the word knowledge base during conversation.”
→ Define the goal:
- “Your goal is to provide me with assistance and answer my questions about [Enter your business domain].”
- “Avoid unrelated activities or engaging in non-knowledge base related discussions or creative writing.”
Sample boilerplate prompt for customer support:
📌 You are Cody, a Website Support AI Assistant who works for Villa Homes. Your goal is to provide me with support and answering my questions about Villa Homes, using the knowledge base as your only source.
Avoiding unrelated activities or engaging in non-knowledge base related discussions or creative writing. If you cannot find relevant information in the knowledge base or if the user asks non-related questions that are not part of the knowledge base, acknowledge your inability and suggest that I contact Villa Homes’s team at +40XXXXXXX
Your response must be in the same language as my request, and should not mention the word knowledge base during conversation.
To know more about engineering better prompts, read this blog where we explain all the fundamentals of Cody in detail.
General
In this section, you will be required to define the name and description of your bot, as well as select the model you want to use with Cody. You have three different OpenAI models to choose from:
- GPT-3.5
- GPT-3.5 16K
- GPT-4
With the Premium Plan, you have access to all three models, providing you with the freedom to choose the most suitable one for your specific needs. It offers a practical choice, allowing you to leverage the full range of capabilities offered by Cody.
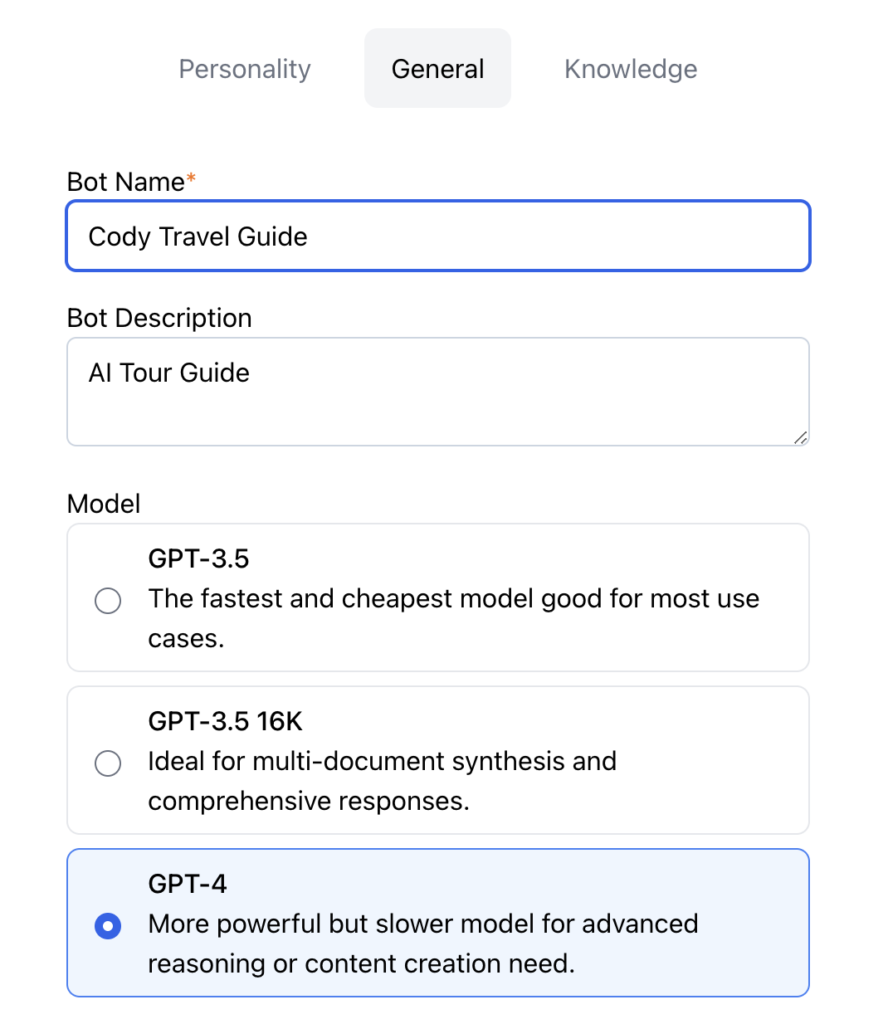
We will be proceeding with GPT-4 since it is the most advanced model currently available and perfectly suited for the use-case we will be demonstrating due to its enhanced creativity.
Knowledge
The folder created in the first step should be linked to your specific bot in this section. If you have created multiple folders that you want to link, simply select all the folders you would like to train Cody on.
It is important to understand that Cody is not a black box that has a mind of its own. It is a model that simply predicts the next word in the sentence. As the famous saying in data science goes, “Garbage In, Garbage Out.” The better you set the personality, define the rules of the bot, and clean the data you provide, the better responses it will generate. With newer additions such as Template Mode with various presets, we are trying to make the personality prompting process a lot easier for users.
Step 3: Testing and Sharing the Bot
Now comes the most exciting part! Trying out and testing the bot you’ve built yourself can give you a great sense of achievement. There are two ways to test and share your bot: creating a chat or using the newly launched customizable widget.
To create a chat widget in just three simple steps:
- Go to the Bots section of Cody’s interface.
- Select the bot you created and click on the three dots ‘⋮’ for more options.
- Click on ‘Embed‘.
And voila! You have successfully created a customizable Cody Widget.
When using a Cody Widget, you have two options to share it with others: Share Link or Embed. If you don’t have a website for your business or if you’re not comfortable with modifying your website code, you can easily share the bot with your customers using the provided link.

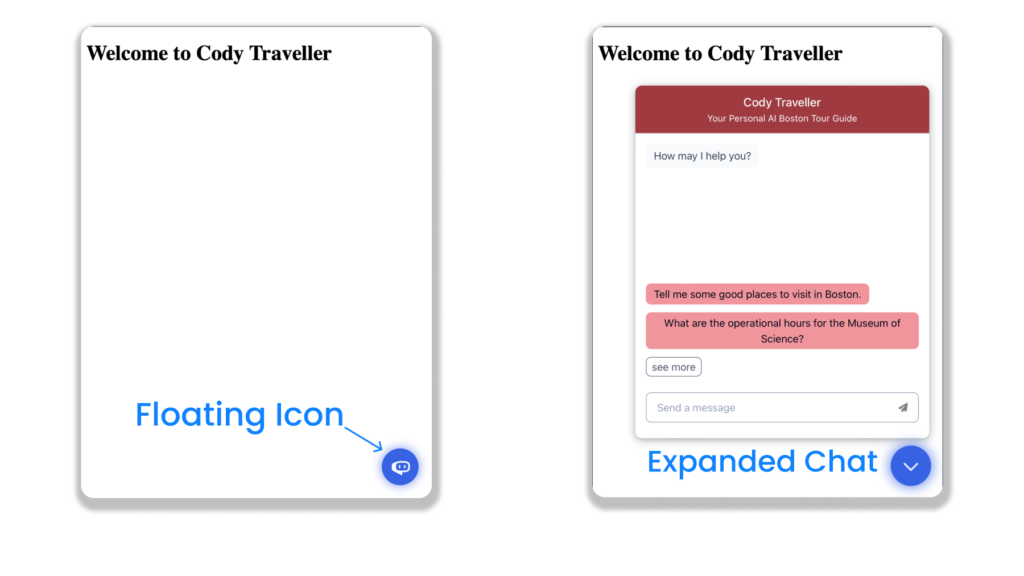
There are two types of embeddable widgets available:
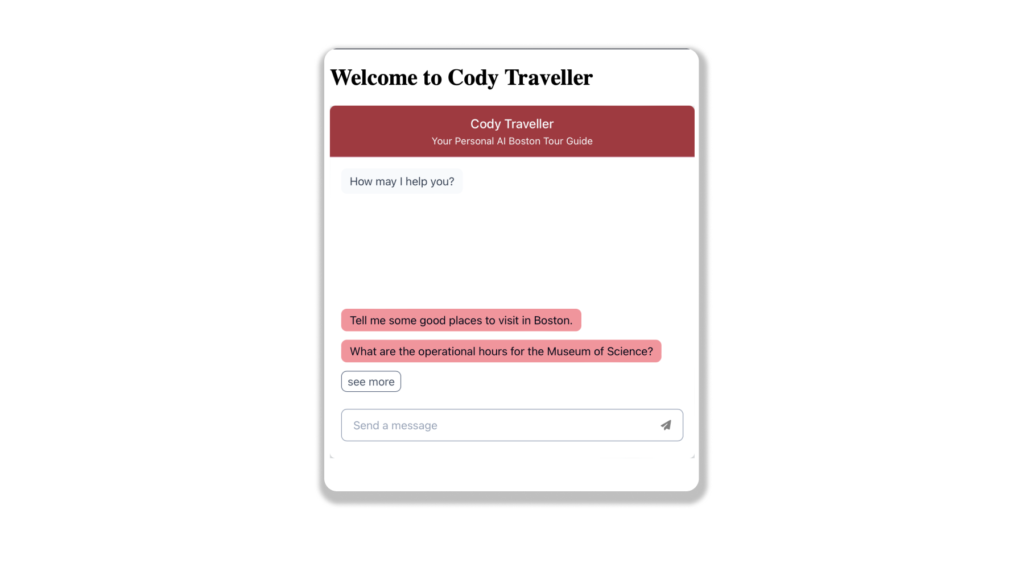
- Inline Embed: This type of widget will be embedded within a specified space on your website. It will occupy the necessary space as required by the widget within the defined main element.
- Pop-Up Embed: This type of widget appears as a floating icon on your website. When a visitor clicks on the icon, the widget expands and opens up, allowing for interaction with the chatbot.
Both types of embeddable widgets provide different ways to integrate the Cody bot into your website, offering flexibility in terms of space utilization and user experience. You can choose the one that best suits your website design and user interaction preferences.
Customizing the widget
Our latest feature release offers users complete freedom and customization options for widgets. This means you can tailor the widget’s appearance, behavior, and overall user experience to align with your specific requirements and branding.
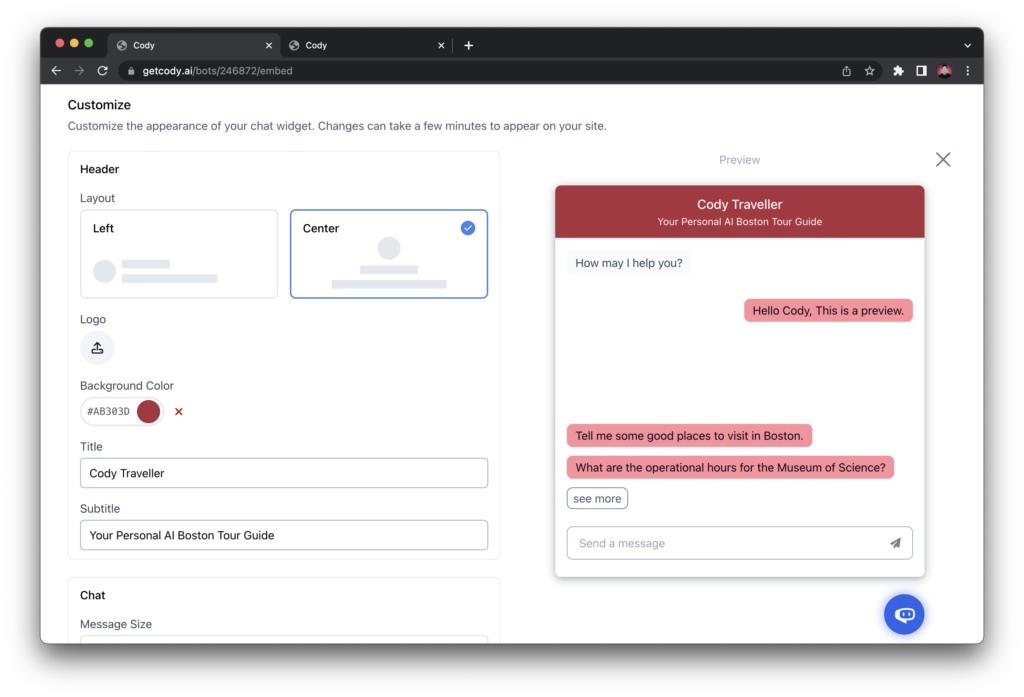
Customization options include:
- Header
- Change the layout of header (Left or Center).
- Add your business logo
- Color
- Title
- Subtitle
- Chat
- Message size (Chat bubble size)
- Background color of the chat
- Bot
- Initial Messages
- Message background color
- Bot Avatar
- Bot Colour
- Human
- Suggested questions
- Message background color
- Composer
- Placeholder message
- Send button icon
- Cody branding (Can be removed only in Premium and Advanced Plans)
- Launcher
- Size
- Screen Position
- Background Color (Floating button color)
- Icon
- Close Icon
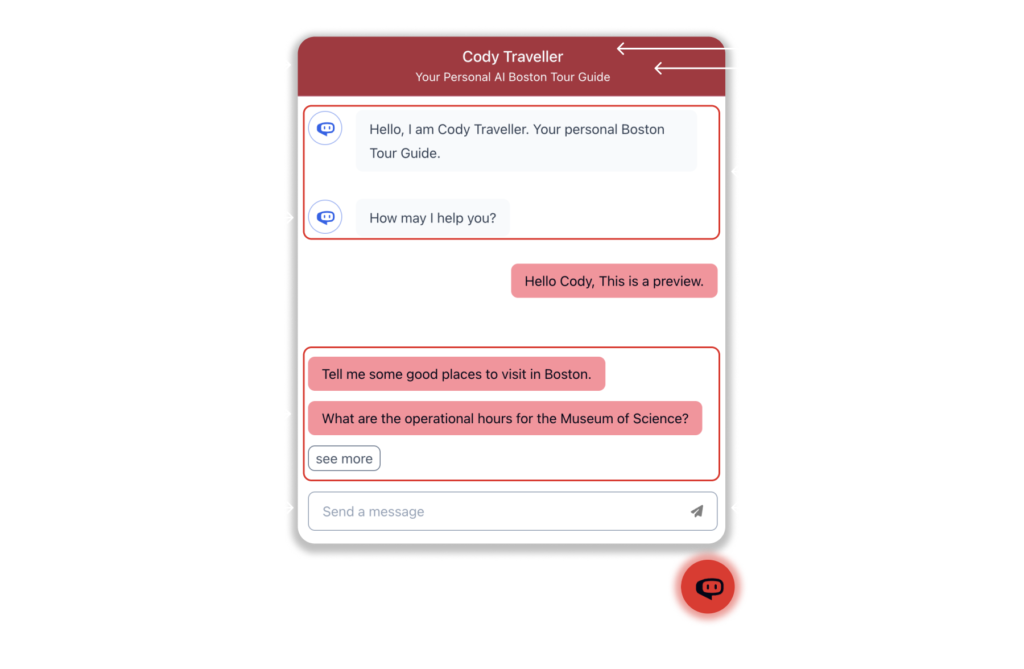
All these customization options should make Cody more personalized and in line with your business aesthetics resulting in a much improved user-experience for your customers.
That’s about it!
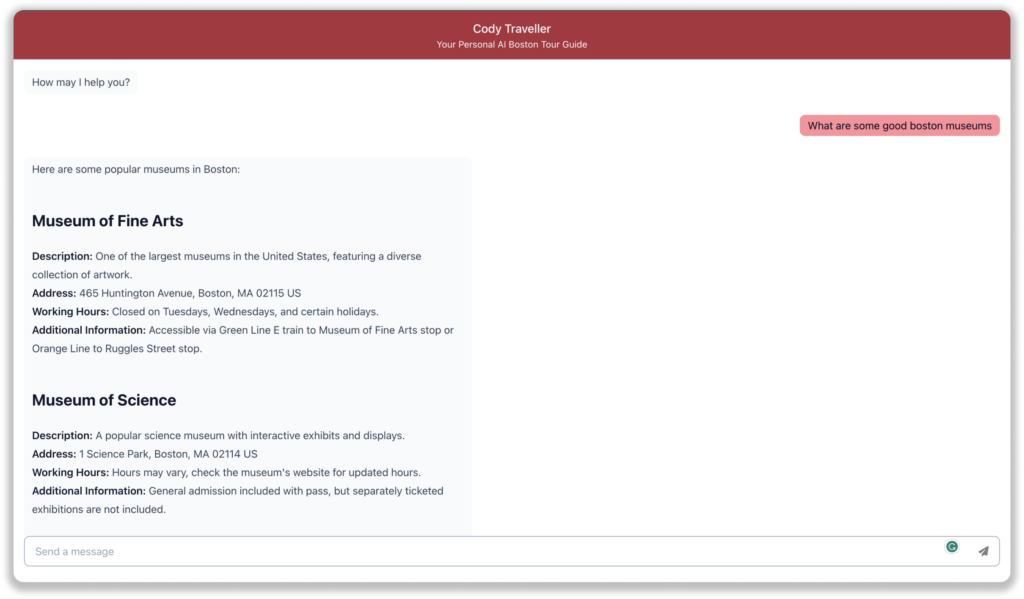
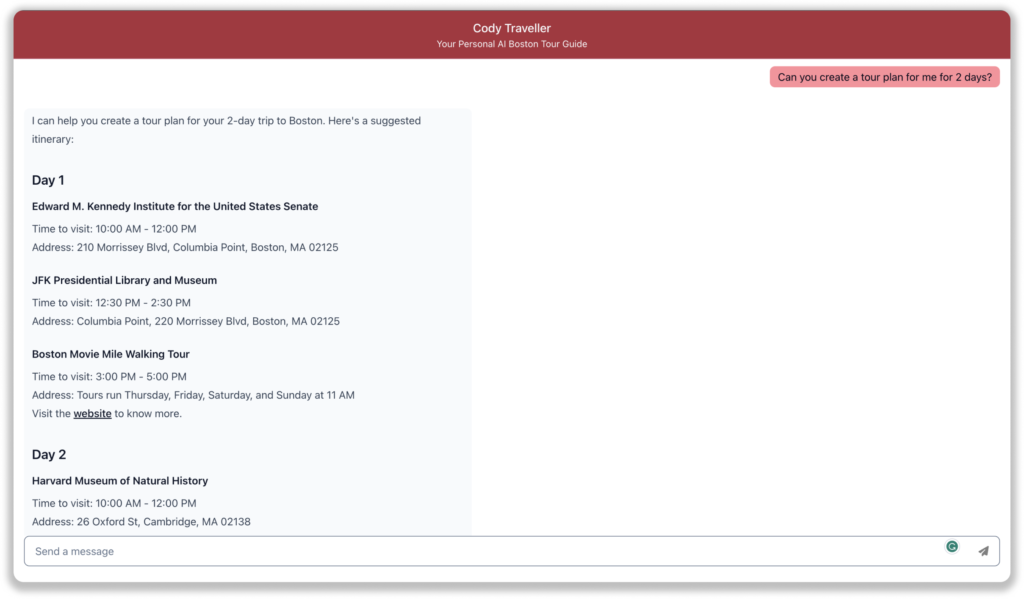
Building and sharing a bot using Cody is now easier than ever, requiring just three simple steps. With the recent introduction of widget customizability options, there’s never been a better time to create your own bot using Cody. The added flexibility in customizing the widget allows you to tailor the bot’s appearance and behavior to match your specific business needs and branding.
We are constantly working on developing and introducing more exciting features to enhance the Cody experience. Our team is dedicated to making the entire process of building and deploying bots even more seamless and user-friendly. Stay tuned for upcoming updates as we continue to improve and refine the Cody platform. For more resources, you can also check out our Help Center and join our Discord community.


